Before you can use Home Assistant Connect ZWA-2 with Home Assistant, you need to connect it to a smart home hub running Home Assistant. The following steps show you how to do this.
Prerequisites
- Home Assistant smart home hub with a USB 2.0 port, for example, a Home Assistant Green.
- If you do not have Home Assistant installed on the hub yet, follow these steps.
- Home Assistant 2025.8 or newer installed on your smart home hub.
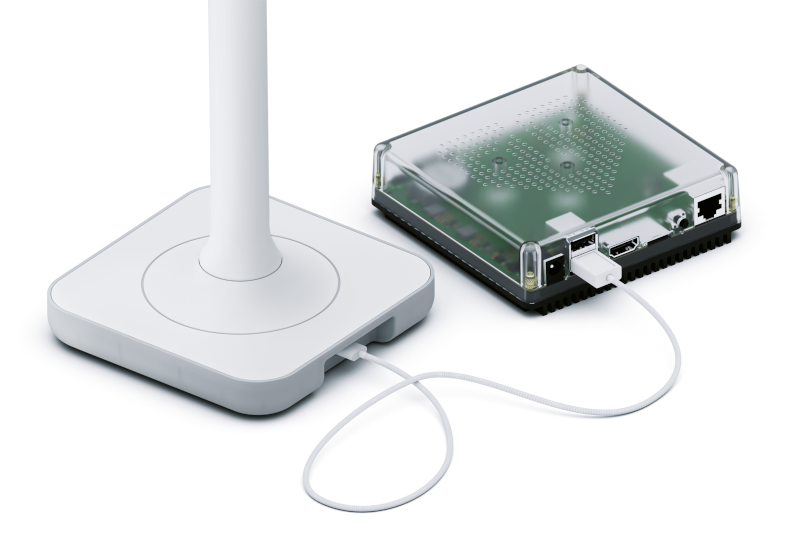
- Home Assistant Connect ZWA-2 with a USB-C to USB-A cable (included in the box).
To form a new Z-Wave network
Step 1
Find a good location.
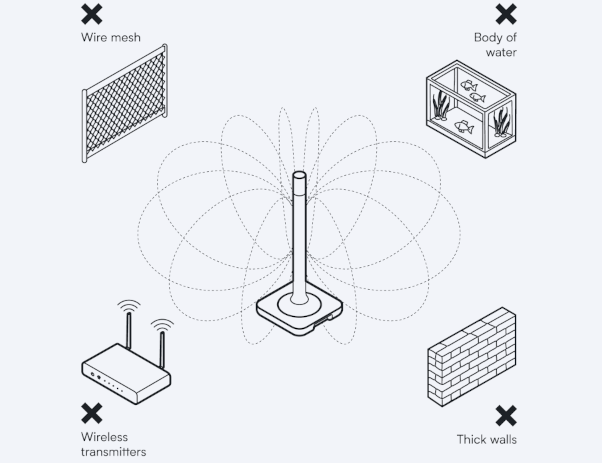
- Place the device away from objects that may cause interference or block signals, such as:
- thick walls
- wire mesh
- metal (such as server rack housings or wall mounting brackets)
- other transmitters (such as computers, routers, USB 3.0 ports)
- an aquarium.
Step 2
Install the device
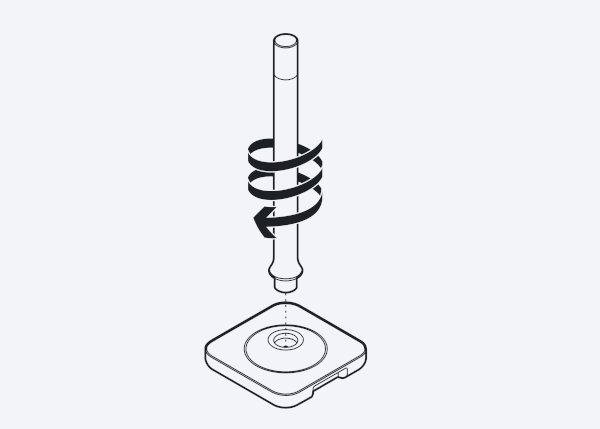
- Screw the antenna onto the base and make sure the device is placed in a vertical position.
- Notice: Be careful not to overtighten. It could damage the device beyond repair.
- Don't fix the device into place permanently yet.
- After you have connected the device to Home Assistant, you can check if your device is in a good spot or if there is interference. Depending on the result, you might want to move it to another location.
Step 3
Connecting Home Assistant Connect ZWA-2 to Home Assistant
- Follow the Z-Wave integration documentation on connecting Home Assistant Connect ZWA-2 to Home Assistant.
Step 4
Check for interference
- You're all set, Home Assistant Connect ZWA-2 is connected to Home Assistant.
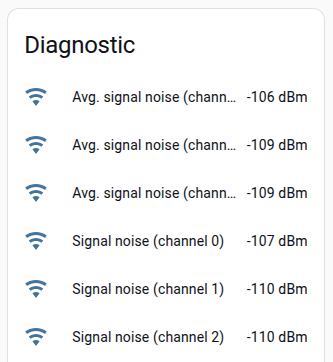
- To be sure your device is in a good location, follow the steps under checking the distance to other transmitters to avoid interference.
Related topics
- Device overview
- About Home Assistant Connect ZWA-2
- Migrating an existing Z-Wave network to Home Assistant Connect ZWA-2
Prerequisites
- Finding an installation location
- Installing Home Assistant Connect ZWA-2
- Home Assistant installation documentation for different hubs